

Manage connections
You can connect to multiple MCP servers simultaneously. To manage connections, go to the Servers tab in the MCPJam sidebar.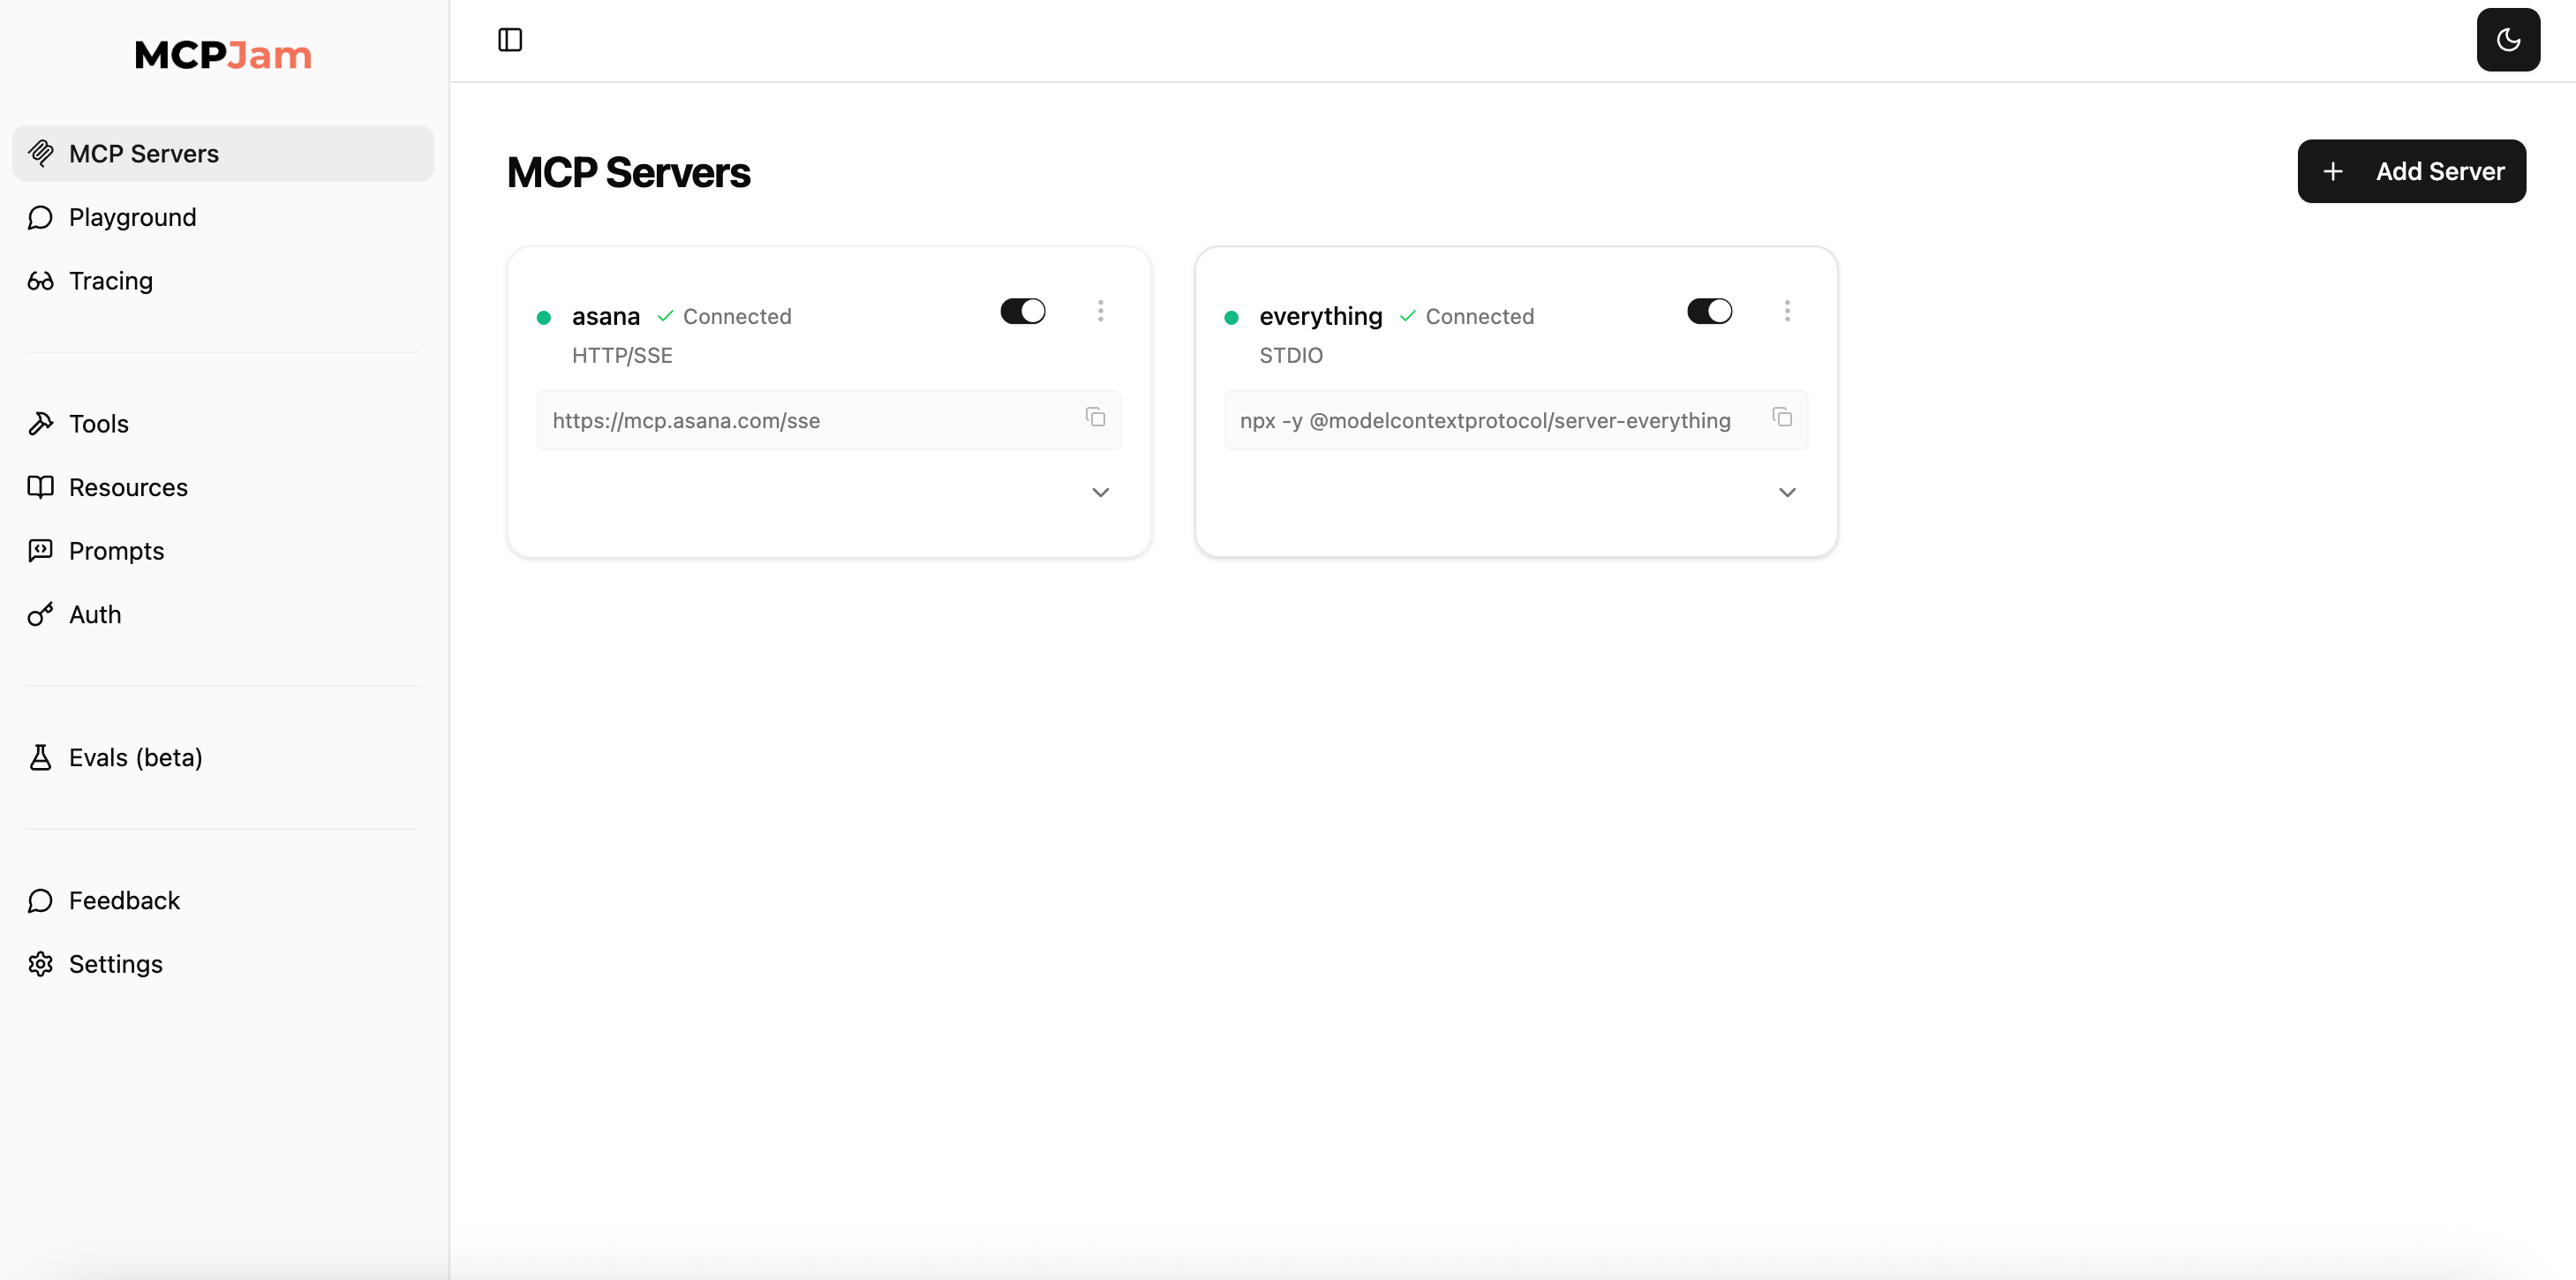
- Toggle MCP servers to enable or temporarily deactivate a server.
- Hit the 3 dots. You can reconnect, edit, or disconnect to a server.
- Click “View server info” to open a detailed modal showing server metadata, protocol version, capabilities, and instructions.
Server info modal
View comprehensive server details in a dedicated modal dialog:- Server metadata: Name, title, version, protocol version, and transport type
- Capabilities: Tools, prompts, and resources supported by the server
- Instructions: Server-provided instructions for AI assistants
- Raw capabilities: Full JSON of server and client capabilities (with copy button)
- OpenAI Apps SDK: For servers using the OpenAI Apps SDK, view widget metadata in a separate tab
History tab
The History tab in the server detail modal shows a timeline of every revision recorded for that server. Each row displays the revision number, a tool-count delta relative to the previous revision, and a timestamp. Click any revision row to expand it. The expanded panel shows:- Diff view (default for revisions 2 and later) — highlights tools added, removed, or updated compared to the previous revision.
- Snapshot view — lists all tools captured at that revision, with each tool’s name and description.
Server information
Each connected server card displays:- Server icon and version: If provided by the server, the icon and version number appear in the card header
- Connection status: Real-time indicator showing connected, connecting, or failed status with retry count
- Transport type: Shows whether the server uses STDIO or Streamable HTTP
- Server capabilities: Lists available features (Tools, Prompts, Resources)
- MCP protocol version: The protocol version the server implements
- Instructions: Server-provided instructions for AI assistants
- Documentation link: Direct link to the server’s documentation if available
OpenAI app metadata
Servers that provide OpenAI-compatible tool metadata display an OpenAI logo indicator. Expanding these servers shows two tabs:- Info tab: Standard server information and capabilities
- OpenAI Tool Metadata tab: Detailed metadata for each tool including read/write permissions and widget configuration
Using the hosted app? Only HTTPS connections are available. STDIO and plain HTTP connections require the local inspector. See Hosted App for details.
STDIO servers
Connect to STDIO with commands. Commands vary based on what language your MCP server is built with. For example, connecting to an MCP server built with Node might look like:For local development, always use absolute paths (e.g.,
/Users/yourname/project/server.py) to avoid path resolution issues.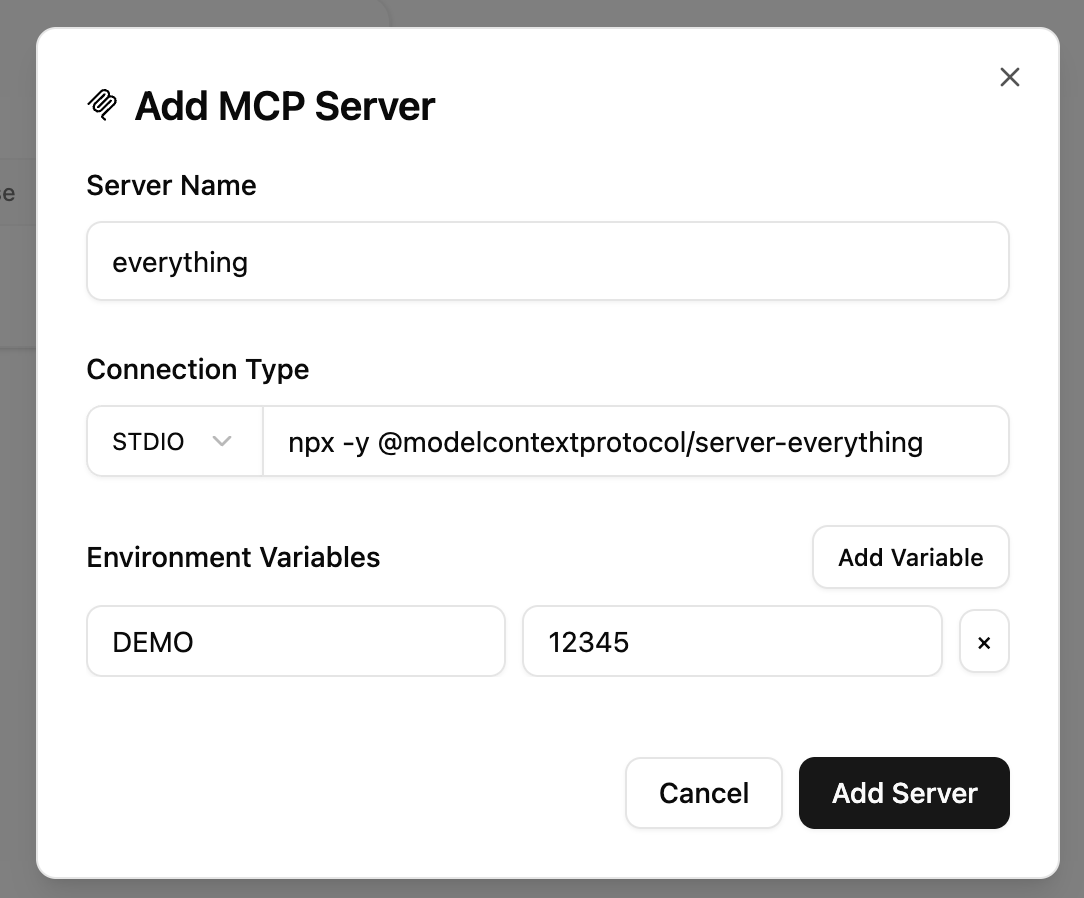
Environment variables
You can configure environment variables with STDIO. Click “Add Variable” in the Environment Variables section. This is often used to pass dynamic values like API tokens to a STDIO server.HTTP servers
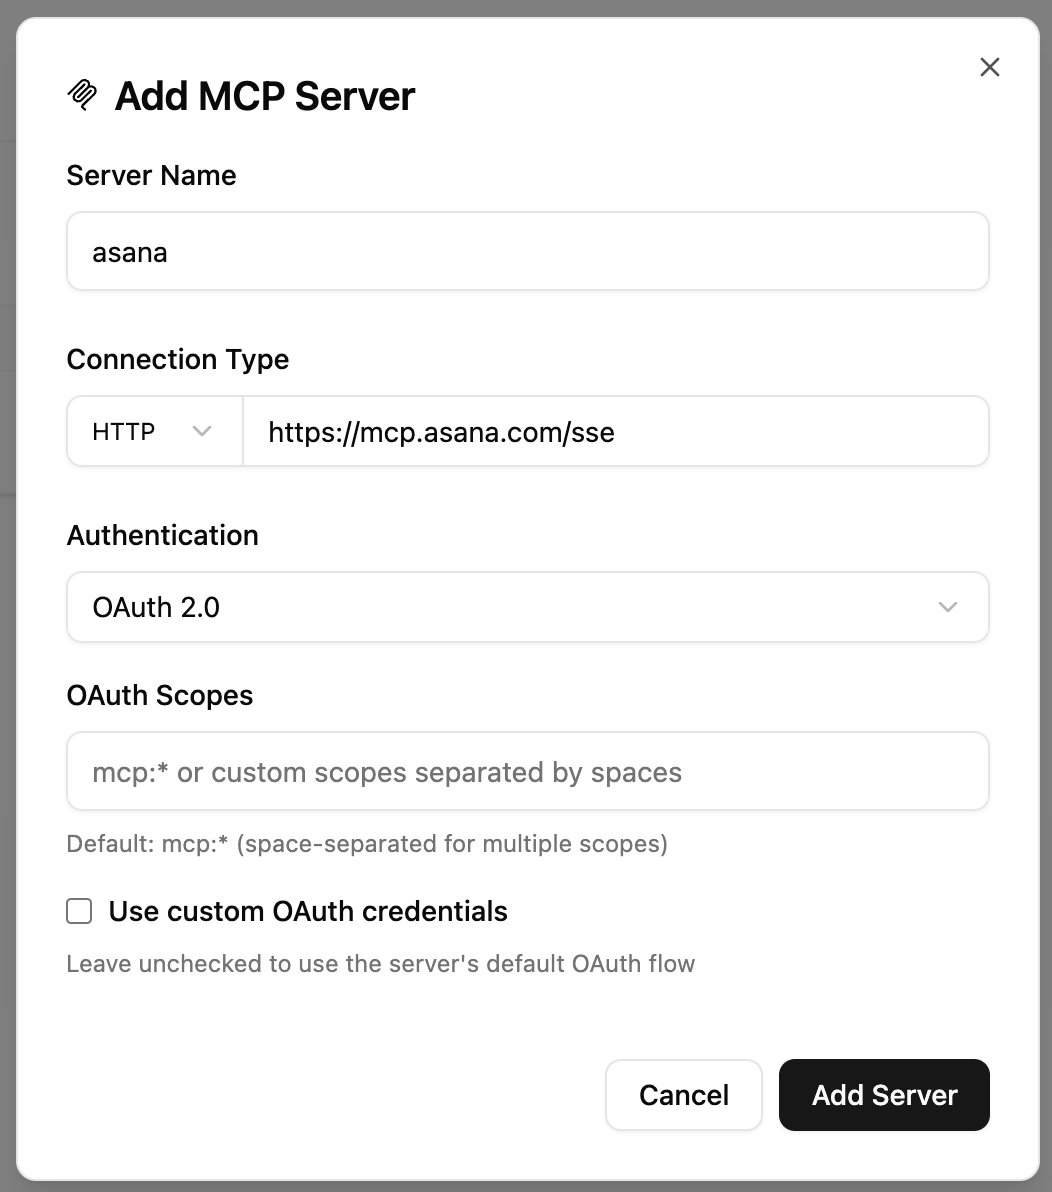
Connect to any Streamable HTTP MCP server by selecting HTTP in the transport dropdown and pasting in the URL — typically ending in/mcp.
Custom headers
Expand Custom Headers to add arbitrary request headers (for example, proxy auth or tenant identifiers). Headers are sent on every request to the server.Authentication
MCPJam is compliant with the MCP authorization spec and supports Dynamic Client Registration (DCR), client pre-registration, and Client ID Metadata Documents (CIMD). You can:- Choose No Authentication
- Choose Bearer Token — use this if you already have an API token and don’t need to register an OAuth client.
- Choose OAuth — follow MCP Authorization to obtain a bearer token. You can optionally set scopes or a custom client ID and secret. For step-by-step debugging, see the OAuth Debugger.
Request timeout
Expand Additional Configuration to override the request timeout (default10000 ms). Increase this when talking to slow or cold-start servers.
Tunneling
Expose your local MCP servers over HTTPS for remote access. This lets you share your servers with external clients and applications without deploying them. Each tunnel is scoped to a single server and secured at the network edge: the tunnel URL contains a secret key (?k=…) that is enforced before any traffic reaches your machine. Requests without the correct key are rejected with a 401 at the edge.
Create a tunnel
- Go to the MCP Servers tab.
- Click Create Tunnel on the server card you want to expose.
- Copy the tunnel URL from the server card and paste it into your MCP client (for example, ChatGPT’s custom connector settings).